Essential Guide to Using a Diff Bearing Puller: Step-by-Step Instructions, Safety Precautions, and Expert Insights
Introduction
A differential bearing puller is an essential tool for various automotive repairs and maintenance tasks, particularly when it comes to removing or replacing differential bearings. These bearings are crucial components that allow the wheels to turn independently while maintaining the drive connection between the axle and the wheels. Worn or damaged differential bearings can lead to serious safety concerns and affect vehicle performance. Hence, having the right tools and knowledge to handle diff bearing removal and installation is paramount. This comprehensive guide provides a detailed overview of diff bearing pullers, their types, safety considerations, a step-by-step approach to using them, and valuable tips from industry experts.
Understanding Differential Bearings
Before delving into the intricacies of diff bearing pullers, it's essential to understand the role and significance of differential bearings in an automotive system. Differential bearings are specialized bearings that enable the wheels on each side of the axle to rotate at different speeds while maintaining a constant drive connection. This feature is crucial when navigating corners, as the outer wheel needs to travel further than the inner wheel. Worn or damaged differential bearings can result in increased noise, vibration, and, in severe cases, complete drivetrain failure.
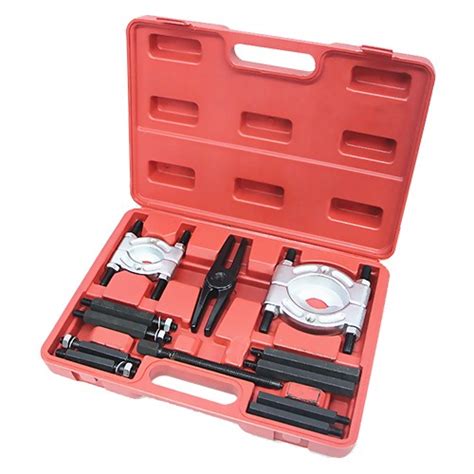
Types of Diff Bearing Pullers
There are two primary types of diff bearing pullers:
-
Mechanical Diff Bearing Pullers: These pullers utilize a combination of levers and hydraulic pressure to exert force on the diff bearing, allowing you to remove it from the differential housing. They are generally more affordable than hydraulic pullers but require more manual effort to operate.
-
Hydraulic Diff Bearing Pullers: Hydraulic pullers use hydraulic pressure to generate significant force, making them ideal for removing stubborn or seized diff bearings. They are often more expensive than mechanical pullers but offer greater power and ease of use.

The choice between mechanical and hydraulic pullers depends on the specific application, bearing size, and availability of resources.
Safety Precautions When Using Diff Bearing Pullers
Working with diff bearing pullers involves handling heavy components and applying significant force. Hence, safety should always be the topmost priority.

-
Wear appropriate safety gear: This includes gloves, eye protection, and closed-toe shoes.
-
Securely position the vehicle: Park the vehicle on a level surface, engage the parking brake, and use wheel chocks to prevent movement.
-
Use the correct puller: Ensure the chosen puller is suitable for the size and type of diff bearing you are removing.
-
Apply force gradually: Avoid using excessive force, as this can damage the puller or the differential housing.
-
Be aware of pinch points: Keep hands and fingers away from potential pinch points during operation.
-
Inspect the puller and diff bearing: Before starting the removal process, inspect the puller and diff bearing for any signs of damage or wear.
Step-by-Step Guide to Using a Diff Bearing Puller
Step 1: Prepare the Diff Bearing
- Clean the bearing and the surrounding area thoroughly.
- Remove any retaining clips or bolts holding the bearing in place.
- Apply penetrating oil around the bearing circumference to help loosen it.
Step 2: Set up the Diff Bearing Puller
- Position the puller claws on the bearing's inner race.
- Ensure the claws are properly seated and aligned.
- Adjust the puller to the correct working length.
Step 3: Apply Force
- If using a mechanical puller, use a wrench or socket to tighten the center bolt.
-
If using a hydraulic puller, connect it to a hydraulic pump and gradually increase the pressure.
-
Apply force slowly and steadily until the bearing starts to move.
Step 4: Remove the Diff Bearing
- Once the bearing is loose, carefully remove it from the differential housing.
- Inspect the bearing and housing for any damage or wear.
- Clean the bearing surface and housing before installing a new bearing.
Table 1: Estimated Cost of Replacing Differential Bearings
| Vehicle Type |
Average Cost of Parts |
Average Labor Cost |
| Compact Car |
$250 - $500 |
$200 - $400 |
| Mid-size Sedan |
$300 - $600 |
$250 - $500 |
| SUV/Crossover |
$350 - $700 |
$300 - $600 |
| Pick-up Truck |
$400 - $800 |
$350 - $700 |
Effective Strategies for Removing Stubborn Diff Bearings
-
Use heat: Applying heat to the bearing can expand it slightly, making it easier to remove. Be cautious not to overheat the bearing or damage the differential housing.
-
Tap the bearing: Gently tap the bearing with a hammer to break any rust or corrosion that may be holding it in place.
-
Apply shock: Delivering a sudden shock to the bearing can help dislodge it. Do this by striking the puller handle with a hammer (while wearing gloves for safety).
-
Lubricate the puller claws: Applying a thin layer of lubricant to the puller claws can reduce friction and make removal easier.
Table 2: Comparison of Mechanical and Hydraulic Diff Bearing Pullers
| Feature |
Mechanical Puller |
Hydraulic Puller |
| Force Capacity |
Lower |
Higher |
| Ease of Use |
Requires more manual effort |
Less manual effort |
| Cost |
More affordable |
More expensive |
| Suitability |
Smaller bearings, DIY use |
Larger bearings, professional use |
Humorous Stories and Lessons Learned
-
The Case of the Overzealous Mechanic: A mechanic was so eager to remove a diff bearing that he applied excessive force with the hydraulic puller. The result? A shattered differential housing and a costly repair bill.
Lesson: Always use caution and gradually increase the force applied by the puller.
-
The Tale of the Stuck Bearing: A DIY enthusiast was unable to remove a stubborn diff bearing despite using heat, tapping, and shock. Frustrated, he took the vehicle to a mechanic, who discovered that the bearing was a press-fit type, requiring a specialized tool for removal.
Lesson: Know the type of diff bearing you are dealing with and use the appropriate tools and techniques.
-
The Importance of Lubrication: A mechanic neglected to lubricate the puller claws, resulting in excessive friction and difficulty in removing the diff bearing. After several hours of struggle, he finally realized his mistake.
Lesson: Lubrication is essential to reduce friction and make the puller operate more efficiently.
Call to Action
If you encounter a situation where you need to remove a diff bearing, remember to prioritize safety and use the appropriate tools and techniques. By following the guidelines outlined in this guide, you can effectively and safely remove diff bearings, ensuring optimal performance and longevity of your vehicle's drivetrain.
